
No matter where in the U.S. you live, it's hot in the summertime. All of us have also become dependent on functional air conditioning in our homes, offices, stores, and of course, our cars and trucks. Factory A/C is fitted to just about 100% of new car production these days, and indeed, it's the exception and not the rule to come across any vehicle not equipped with it.
We depend on the A/C in our cars to keep us cool, and it feels like a minor disaster when it stops working. We know that many of you in that predicament have turned to Google and YouTube for help; and as we stated in our article on fixing an inoperative power window, you may or may not find valuable answers on those Internet searches, but here at CARiD we are determined to help you find a solution!
Before you conclude that you need to spend thousands of dollars for a major A/C overhaul, take the time to follow a straightforward diagnostic path. Your "A/C problem" may not be directly related to the air conditioning system at all.
Initial Checks
To perform these basic checks, you need to be able to identify the auxiliary drive belts on the engine and know the location of the car's fuse box or boxes. If in doubt, consult your owner's manual or service manual, or seek the assistance of a knowledgeable friend.
Auxiliary Drive Belt
Start here: is the auxiliary drive belt which drives the A/C compressor in place? It's certainly possible that the belt may have broken and fallen off; if this is the only issue, you're lucky! Even if the belt is in place, is it properly tensioned? With the engine off, press on the belt at a halfway point between two pulleys. If you are able to deflect the belt more than 1/2" or so, the belt may be loose and needs tightening. A missing or loose A/C compressor belt might be all the 'fix' your car needs.

Auxiliary drive belts are found at this link: https://www.carid.com/auxiliary-serpentine-belts.html. Do not confuse these with engine "timing belts" which connect the crankshaft and camshaft(s). When ordering a new auxiliary drive belt, in addition to the year, make, and model of your vehicle, you will need to know engine size, and in some cases, whether the vehicle has other belt-driven components such as power steering or an air pump.
Blower Motor
On almost all modern cars, the A/C system is integrated with the heater and defroster systems into what is called the "HVAC" (heating/ventilation/air conditioning) system. The blower motor, or interior fan motor, is an integral part of the HVAC system. Are you sure yours is working? Modern vehicles are wired such that the A/C system will not turn on if the blower motor is off.

With the ignition "on" but the engine off, rotate the blower motor control knob through all its positions. You should clearly be able to hear the fan motor. If not, check the fuse for it. If the fuse is ok, you may have a deeper issue with the fan motor, and that needs to be remedied before someone starts to replace any expensive A/C parts.
Fuses
Numerous components, including the fan motor and compressor, are protected by fuses. It's always a best practice to check all fuses before continuing with further diagnosis. As we have stated in previous articles, it's not enough to just "eyeball" the fuse; either remove it from the fuse box for a more thorough visual check, or better, test it with a test light or DMM (digital multimeter) to ensure its continuity. If there is any doubt, replace it.
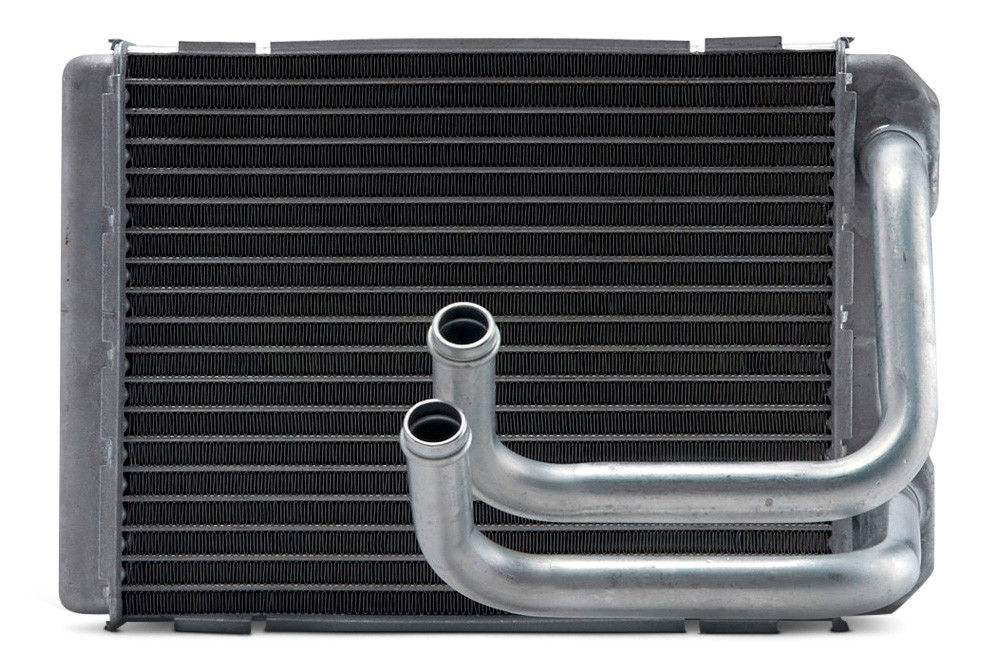
Heater Core
This has happened to me: my A/C no longer blew cold, but the A/C system was fine; the culprit was a heater system that was stuck "on", resulting in heat which was hot enough to override the cold of the air conditioning! Try this: with the engine at operating temperature, turn the A/C off, and then work the heater system through its range, from completely off to 'full blast furnace'. With the heater "off", you should feel air through the vents which is no warmer than the outside ambient air. If it feels like you are unable to turn off the heat, the problem could be the heater core itself, a heater control valve, or a blend door/blend door actuator within the HVAC system. Like the blower motor discussed above, this needs to be fixed before going any further with the A/C system.
Basic A/C Functions
If the car has passed all the basic checks in Step 1 above, then you can move on to conducting initial tests of the air conditioning system itself. With the exception of an optional temperature gauge (part of some DMMs), no special tools are required to check these functions.
System Integrity
This is an eyeball test: are all A/C components in place and undamaged? Check the condenser (in front of the radiator) to ensure that road debris has not impacted and damaged it. You've already checked the compressor's drive belt; also check that there is no external damage to the compressor itself. Be sure to examine the wiring to the compressor clutch. Look at, or better yet, handle all the underhood air conditioning lines (do this on a cold, non-running engine). These rubber hoses must be securely connected at each end, and must show no holes or splits. When touching them, the rubber should feel firm, not spongy, and you should not feel excessive oil or grease on any of the lines.

Any physical damage to an A/C component or hose means that the system has been compromised, and it's likely that all the refrigerant has leaked out. This kind of damage must be repaired, and is beyond the capabilities of most DIYers, unless you own an A/C evacuation and charging setup.
Compressor Clutch
If the system passes the integrity test, start the engine and turn on the A/C system to maximum cool. With the hood open, observe the clutch at the front of the A/C compressor. It should be turning, and in fact may be 'cycling' on and off, which is a good thing. (Quick mini-lesson: just because there is a belt on the compressor clutch doesn't mean it's spinning all the time. The clutch has the ability to engage and disengage, so, with the A/C off, the clutch does not spin, which reduces engine load. And when the A/C is on, the system cycles on and off to avoid freeze-up.)
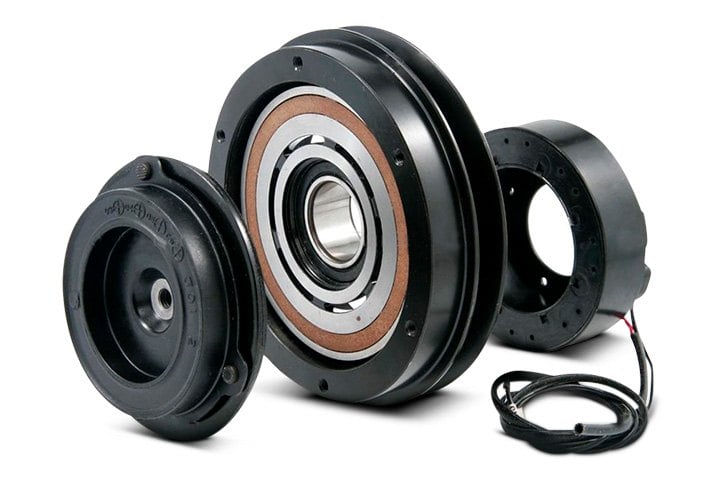
If the compressor clutch does not engage and spin with the A/C on, the system could be low on refrigerant. On most vehicles, there is a low-pressure cut-out switch which prevents engagement with low refrigerant charge, which could damage the compressor. There also could be an electrical problem in the HVAC system preventing current from reaching the compressor.
Receiver-Drier Sight Glass
Locate the receiver-drier in the engine compartment, which will have a sight glass in its top. With a fully-charged system, you should see a steady flow of liquid, without bubbles, in the sight glass. Any sign of bubbles means that the system is low on refrigerant and needs to be recharged (covered below). No flow of refrigerant AND no bubbles could mean that the system is completely devoid of refrigerant. In such a case, a more thorough check of system integrity, using a vacuum pump, may be advisable before adding any refrigerant.
Temperature Checks
A further test of refrigerant level can be accomplished by checking the temperature of the air at the dash vents. This kind of test is most valid if you think the A/C is "cool" but not blowing as cold as it used to or as it should. With the A/C system on 'max', and all doors and windows closed, run the system for a few minutes, and place an A/C thermometer into one of the dashboard vents. You should get a reading between 40 and 50 degrees F (this will vary greatly based on outside ambient temperature, the capability of your car's system, and whether any air is flowing through the condenser). Check your service literature to see if the vehicle manufacturer specifies a temperature range for this test.
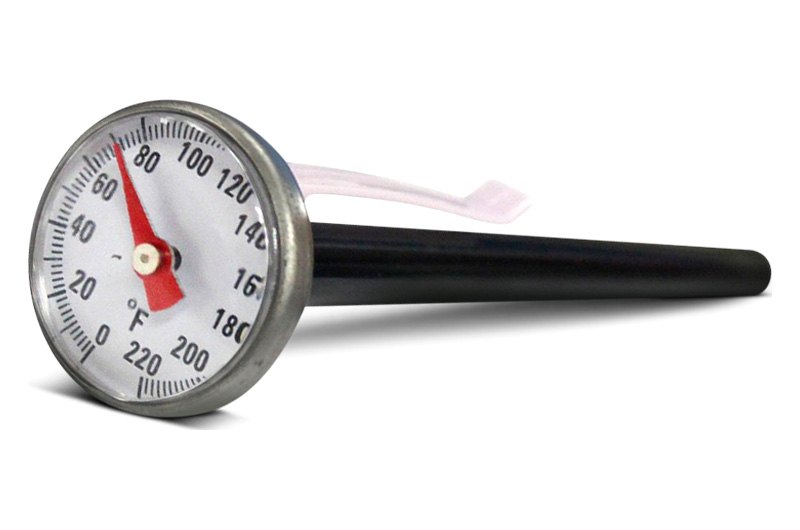
A reading just slightly higher than spec probably means the system is slightly low on refrigerant but is otherwise functional. If, up to this point, your car has passed all the initial checks and basic A/C function checks outlined above, you're safe to proceed with a recharge. If, however, you obtain a temperature reading that's barely different than the ambient air, there are more involved issues which likely will need to be addressed by a professional. The good news is, you can speak with some authority to the A/C technician about what you've checked and found; the tech will appreciate it!
Adding Refrigerant
Before you purchase any cans of refrigerant, whether that's from us or from your local store, be certain as to the type of refrigerant in your vehicle. Prior to 1993, all vehicles with the exception of BMW and Volvo used R-12 refrigerant, also known by its DuPont trade name Freon. The 1993 BMWs and Volvos, and all 1994 and up cars, switched to the more environmentally friendly R134a. Starting in model year 2021, new vehicle manufacturers have switched again, this time to R1234yf. Since the vast majority of vehicles on the road today are using R134a, we will discuss adding that to your A/C system.
Topping Off The System
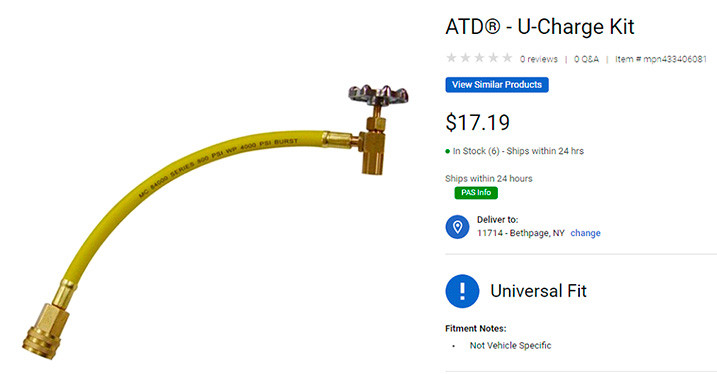
If, after following the diagnostic path outlined above, you have concluded that your car or truck only needs a small amount of refrigerant added, the good news is that this task is well within what can be done in your own driveway. You will need a can (typically 12 oz.) of R134a, and a service hose which will allow you to connect the can to the low side connector of the A/C system.
Insert the valve from the service hose into the top of the can of refrigerant. Keep the can in the upright position and keep the valve closed. Connect the other end of the service hose to the low side fitting. (On R134a-equipped cars, the low side and high side fittings are two different sizes; your service hose will only fit on the low side. Refer to your service literature if you're unsure of its location.)
Start the engine and turn on the A/C to maximum cold. Only then should you open the valve on the service hose. The system will begin to draw refrigerant from the can and into the car's system. This can take anywhere from 10 to 30 minutes. The process can be quickened by immersing the can in hot water, but again, be sure the can remains upright at all times! The can will become very cold to the touch while this is progressing. Watch the sight glass, and place a thermometer if you have one in a dash vent. As the bubbles in the sight glass decrease and as the air temperature exiting the vent drops, you will have confirmation that the system is being recharged.


Complete Evacuation & Recharge
If you have concluded that your system is empty yet is undamaged, or if you have repaired a major leak by, for example, replacing an A/C hose, you may want to consider a complete evacuation and recharge. Doing this is within the realm of a more experienced DIYer, however, it does require some special shop equipment, such as an A/C manifold gauge set and a vacuum pump. We have covered the procedure in good detail, and you can find that in our article, "How To Use An A/C Manifold Gauge Set". Be sure to also investigate if you'll need to add any refrigerant oil to the system at the same time.
Congratulations! Either you have fixed your car's A/C system, or you have a better understanding of what might be wrong, which at least makes you a more informed customer. Best of all, you can now (or will soon be able to) crank up that air and ride in cool comfort again.