When your hood release lever becomes inoperable, you're literally in a catch-22 position. One of the parts that opens the hood has broken, but you can't open the hood to locate and replace it. If you find yourself in this unfortunate predicament, don't panic. In this article, we'll cover how to get that hood open, and we'll guide you in performing the necessary repairs. We'll also discuss replacing gas strut supports if your vehicle uses them under the hood, trunk lid, or tailgate.
Opening A Hood When The Release Cable Is Broken
Items Needed:
In most cases, the cable leading to the release hook at the front of the hood has snapped somewhere, or the release lever assembly has broken apart. If the pull handle inside the vehicle has broken off, a pair of locking pliers will allow you to grab the cable wire sticking out and pull it with enough force to get the hood open.

If the hood release lever inside the vehicle seems intact, you'll need to get the hood open using either a long thin metal rod with some kind of hook at the end, or a long pair of needle-nose pliers. If the layout of your vehicle allows a pair of needle nose pliers to reach in and grab the release cable near the hood latch, try it.
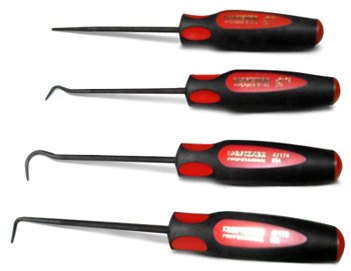

A wire hanger may work, but odds are it will bend too easily when pulling pressure is needed. Another alternative is to try what is known as a hook tool - it resembles a screwdriver, but with a hook shape at its end.
Take your hook tool of choice, and insert it through the top-most part of the grille opening. Once you've gotten your hook tool through to the other side, try to guide the hook end toward the vicinity of the release lever. (If you can't recall where your release lever is, just think back to the last time you reflexively stuck your fingers under there to release the pull handle before things broke.) Patiently, maneuver it around until the hook makes secure connection around the release lever for the hood. Pull it and the hood will release.
If your vehicle is styled without a traditional front grille opening, it's going to be a little harder to reach the release hook - but it's still possible. Instead of inserting your pick through the grille, there should be some kind of gap between the grille-less front fascia clip and the hood panel itself. It will be a small gap, but you'll have some wiggle room to work. Professionals will keep trying with different tools until they find the one that gets the job done. Remain patient, stay with it, and you'll eventually succeed at opening that hood.
Replacing A Hood Release Cable
Items Needed:
- Replacement hood release cable
- Wrenches, or sockets and socket wrench
- Locking pliers
- Needle nose pliers
Once the hood is open, you will have access to the hood's release latch. To remove it, you may first need to remove the radiator shroud plastic cover piece, or the grille itself.
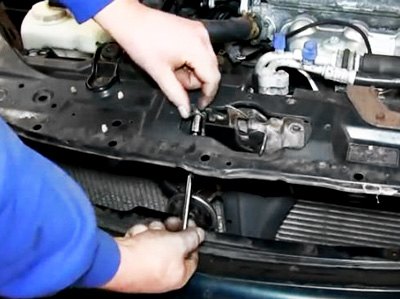
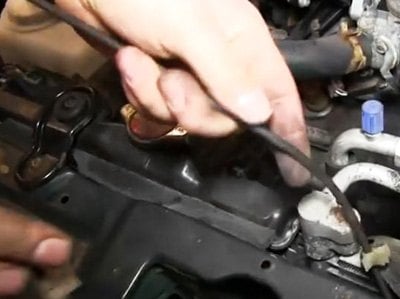

Using the appropriate size wrench or socket, remove the bolts that secure the hood release latch and pull the latch assembly up. On most vehicles, the cable end should unhook from the latch relatively easily. To free the cable, use a pair of pliers to grab and release any tabs that hold the cable in place.
Feed the old cable out through any holes and ducts it is routed through under the hood, making sure to keep the old clips to reuse with the new cable. On some vehicles, the cable is tucked behind the plastic front wheel well liner. If your vehicle is one of these, simply remove any clips/screws/bolts holding it in place until it's loose enough to reach a hand in and pull the cable loose.
The next step is pulling the old cable out from the inside of the vehicle, where the release lever is. First, tie a thick, sturdy string around the end of the cable that’s under the hood. The string needs to be sturdy enough to handle a small amount of tension on it without breaking.
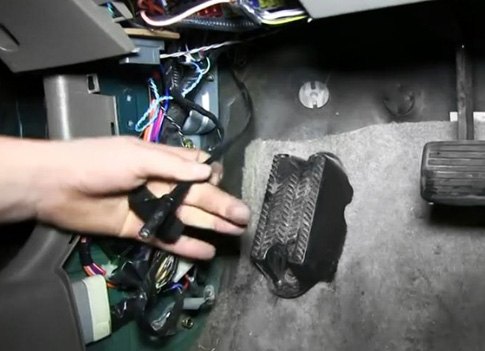

Inside the vehicle, unbolt or pry loose any plastic panels that surround the hood release pull lever. Unbolt the pull lever assembly, and pull the cable out from inside the vehicle until the string comes through. Now attach this string to the new cable end, then use it to pull the new release cable through the pre-established route until you've reached the under hood release lever.
Attach everything in the reverse order. A best practice would be to include the application of a lubricant to the moving parts of the hood release latch.
Replacing Hood, Trunk, And Tailgate Support Struts
Items Needed:
- Replacement hood strut(s) and/or trunk support strut(s)
- Wrenches, or sockets and socket wrench
- Locking pliers
- Torx head bits
- Small flat-blade screwdriver
- Prop rod tool
Trunk lids or tailgates on most modern vehicles contain compact, gas pressurized struts that assist you in lifting the heavy lid and keep it there once it's been opened. When it comes to the front hood, some automakers use support struts there as well. While the pressurized gas inside the strut is inert and not flammable, it's important to handle any of them with caution because that gas is pressurized to several hundred pounds. Mineral oil inside the strut provides the damping needed to ensure your hood or trunk opens gradually instead of flying open, and it allows the strut to compress easily during closing.
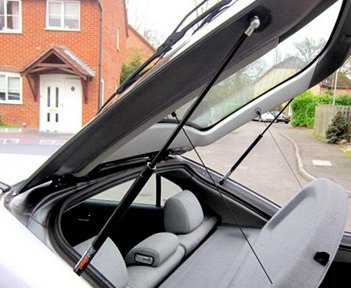
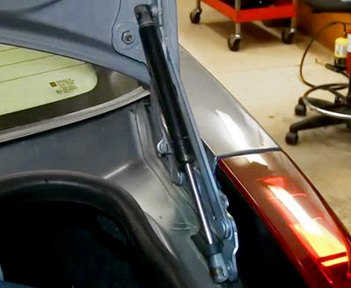
While support struts offer the benefits of light weight, compact design, and low cost, they're best for middle weight applications such as trunk panels and tailgates. Larger vehicles with heavier hoods are usually fitted with permanently-mounted springs and hinges. Smaller vehicles with lighter hoods that are easier to lift up usually have a prop rod that swings into place when support is needed.
After years of use, keeping all that weight lifted high takes its toll on support struts. As they wear out and lose the ability to hold compression, you'll notice your trunk lid or hood no longer stays open by itself. If that's happening on your vehicle, you're risking a hard clunk on the head. Now is the time to replace your support struts.


Whether they're mounted under the hood or in the trunk, support struts are attached in a variety of simple ways that allow easy replacement with basic hand tools. Some vehicles have only one support strut per panel, others may have a set of two – so check before you order replacements.
If you don’t have a prop rod tool handy, obtain a piece of wood approximately one to two feet in length. You might get away with something smaller provided that the panel isn't too heavy - but use something with some strength to it, because you'll be using this to prop the trunk or hood panel up during changing. Wood offers better grip by nature, so the odds it will slide out from under are reduced.
If you're replacing tailgate support struts on a hatchback, be careful not to damage any defroster elements built into the rear glass. If your vehicle has support struts on both sides and using a prop rod is awkward, clamp a pair of locking pliers onto the other old strut rod that hasn't been replaced yet. Make sure your temporary prop rods are secure before proceeding further.
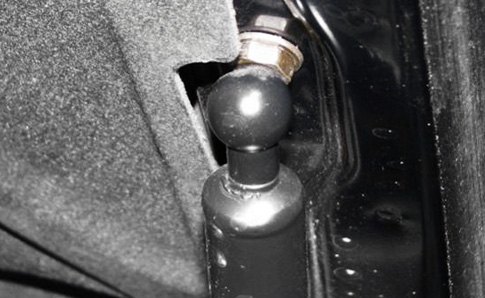

While many designs of support struts snap in place as easily as wiper blades, others must be unbolted with an open-ended wrench. Some even require a special Torx head bit. Use applicable tools to loosen and remove the old support struts.
Make sure the length of your new support struts is an exact match for your old ones when they're extended fully. Certain brands of struts are shipped fully compressed to their shortest length and must be twisted 90 degrees in order to release and function normally.
Some vehicles feature "ball pivot" socket pieces. These socket pieces mount onto the vehicle, and the ball pivot pieces on the support strut ends are snapped into them. Usually, replacement socket pieces come with new support struts designed this way – both are replaced together. Other vehicles may secure both ends of the support struts in place with spring loaded clips. The clips are easily released by using a small screwdriver.
Once your new support struts are installed, remember that their lifespan can be extended simply by wiping the metal center shaft clean periodically. Removing grit means less wear on the multiple-lip seal that rides along the center shaft. Since this seal keeps pressurized gas and oil inside the strut where it belongs, you'll be putting money back in your pocket.
Clean and put away your tools, and enjoy having a trunk, hood, or tailgate that functions like new again!

