
H16 G7 LED Bulb Installation Hints and Tips
Removeable, Reversible Heat Sink
The Bulb heat sink ensures heat dissipation and ensures the long-term operation of the bulb.
Sometimes there is not enough space for installing the bulb with the heat sink or a lamp dust cap doesn't close. In this case a reversible heat sink is used since it can be removed and reversed.
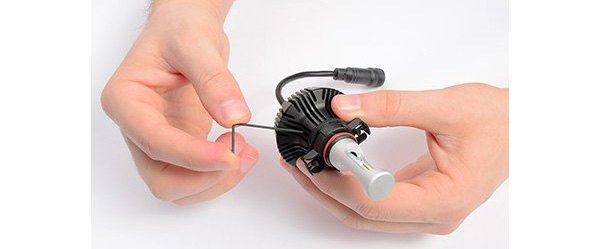
STEP 1. To remove the heatsink, first unscrew fixing bolts with a wrench (comes with the bulbs).
NOTE! The fixing bolts do not need to be removed, just loosened.
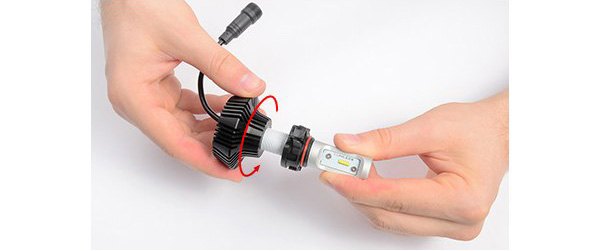
STEP 2. Unscrew and remove the aluminum heat sink from the bulb.
Caution!
A. Be careful not to damage the bulb power wire.
B. Do not touch the threads as they have thermal paste and this can negatively influence heat dissipation.
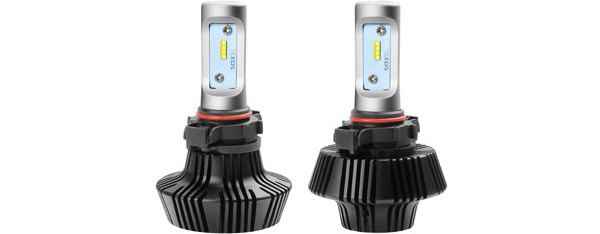
STEP 3. You may find on some installations that securing the bulb retaining clip is easier with the heat sink removed. In these cases, install the clip, then reinstall the heat sink. If a lamp dust cap doesn't close after bulb installation, reverse the installation of the heat sink.
This will make it possible to install the dust cap of lesser diameter.
NOTE! In both cases, be sure to tighten the fixing bolts.

The removable and reversible heat sink solves the problem of the bulb fitting in tight spaces and helps avoid the necessity for construction modification of the lamp assembly.
