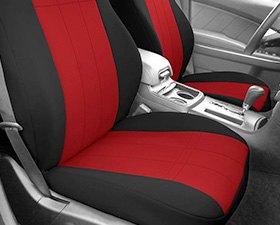
Installation
- Bucket Seat
- 40/20/40
- 60/40
- 50/50
- Solid Bench


Step-by-Step Installation
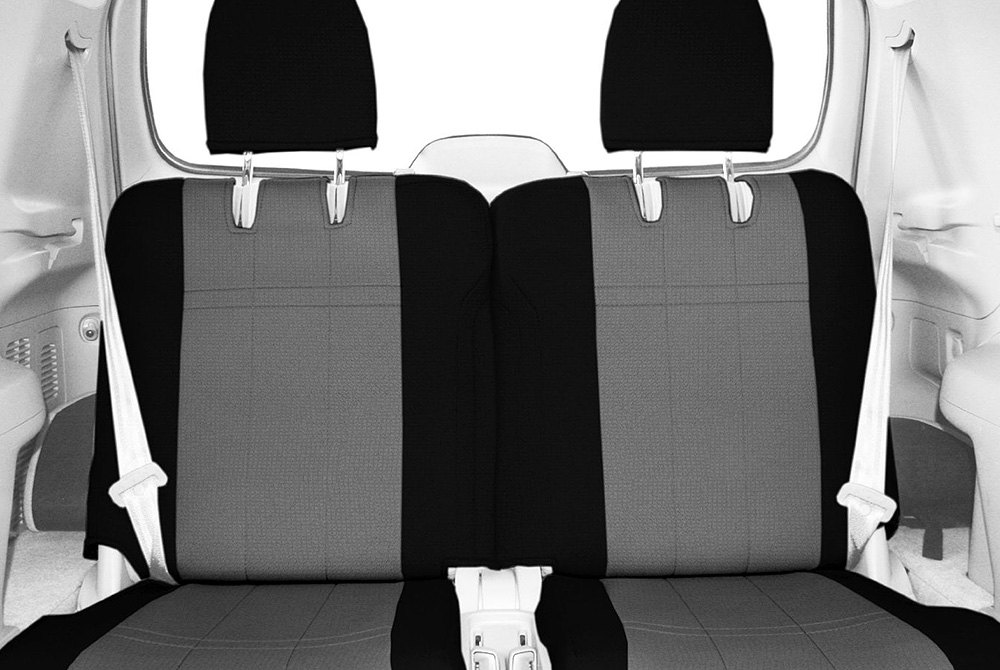
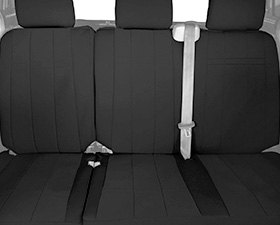
- If applicable, remove headrest. (Some headrests require a small pin in order to be removed.) Then slide the backrest cover over the seat frame until it fits snugly. Make sure the back pouch is facing towards the back.
- Feed the fabric with hook and loop fastener in between the seat. (some seat covers will have it's hook and loop fastener attach to the original upholstery of the seat).
- Stick the hook and loop fastener together, the bottom fitting under the top.
- Insert the headrest cut outs underneath the headrest registers.
- Slide the bottom seating cover over the seat, starting from the front towards the back.
- Feed the belts in between the seat.
- Feed the laces under the seat, make sure to put the straps on top of any wires your seat may have underneath; this will help with any interference with movement and readjusting of seats.
- Attach the laces to their appropriate buckles.
- Insert any excess fabric in the side panels.
- Apply the headrest cover on the headrest. Make sure the rough (male) hook and loop fastener is in the back and the soft (female) hook and loop fastener is the front.
- Enjoy your new custom tailored seat covers.
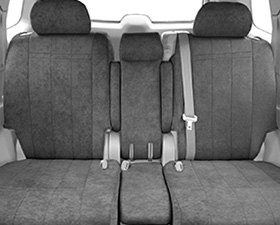

Step-by-Step Installation
- If applicable, remove headrest. (Some headrests require a small pin in order to be remove.)
- Slide the backrest cover over the seat frame until it fits snugly. Make sure the back pouch is facing towards the back and slide the cover under any integrated seat belts.
- Feed the fabric with hook and loop fastener in between the seat. (some seat covers will have it's hook and loop fastener attach to the original upholstery of the seat).
- Fasten the hook and loop fastener from the back of the cover to secure a tight snug fit.
- Stick the hook and loop fastener together, the bottom fitting under the top.
- Slide the bottom seating cover over the seat, starting from the front towards the back.
- Feed the belts in between the seat.
- Feed the laces under the seat, make sure to put the straps on top of any wires your seat may have underneath; this will help with any interference with movement and readjusting of seats.
- Attach the straps with their appropriate belts and pull tightly for a secure fit.. (Note: According to individual car's Make and Model, the buckle may come from the front or the back.)
- Slide the console cover down and attach the hook and loop fastener.
- Apply the bottom console cover over the seat bottom of the console, follow up by attach the hook and loop fastener pieces together.
- Apply the headrest cover on the head rest and attach the hook and loop fastener together, some headrest covers will come with elastic binds instead of hook and loop fastener.
- Enjoy your new Custom Seat Covers!
* Opening Console Installation


Step-by-Step Installation
- If applicable, remove headrest. (Some headrests require a small pin in order to be removed.
Start off by removing the bottom cushion, there are a couple ways to do so:
Locate the clips on both sides of the cushion, pull up until they snap off completely.
Locate the clips on both sides of the cushion, pull on the release levers next to the clips and pull up.
- Completely remove the bottom cushion from the car, place cushion on a flat dry surface (i.e. the hood of your car or table.)
- Remove any items that may get in your way, like integrated seat belts * Your Custom Tailored seat covers will come designed to go under the integrated seat belt if unable to be removed*.
- Slide the upper backrest cover over the seat frame until it fits snugly. Make sure the back pouch is facing towards the back. * If your seats have integrated seat belts, you'll install the custom seat cover under the belt from the side, like a coat*.
- Feed the fabric with hook and loop fastener in between the seat.
- Stick the hook and loop fastener together, the bottom fitting under the top. (some seat covers will have it's hook and loop fastener attach to the original upholstery of the seat)
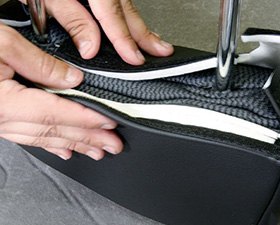
- Fasten the hook and loop fastener from the side of the cover to secure a tight snug fit.
- Insert the headrest cut outs underneath the headrest registers.
- Apply the seat bottom cover over the cushion, make sure the laces and belts are out on the sides.
- Attach the laces to their appropriate buckles, along with the side to side lace and buckle
- Reattach the seat bottom cushion to the car the same way you took it out, reinsert the belts in their appropriate location and adjust the cushion all the way back so it lines up with the clips and holders.
- Once the clips and holders lineup push down until they SNAP back in.
- Apply the headrest cover on the headrest. make sure the rough (male) hook and loop fastener is in the back and the soft (female) hook and loop fastener is the front.
- Enjoy your new custom tailored seat covers.
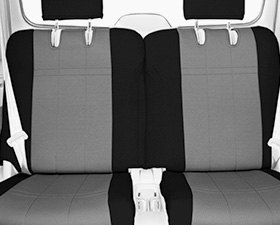


Step-by-Step Installation
- If applicable, remove headrest. (Some headrests require a small pin in order to be remove.)
- Slide the backrest cover over the seat frame until it fits snugly. Make sure the back pouch is facing towards the back and slide the cover under any integrated seat belts.
- Match any cut outs on the seat cover with the seat.
- Feed the fabric with hook and loop fastener in between the seat. (some seat covers will have it's hook and loop fastener attach to the original upholstery of the seat).
- Depending on the seat you can fasten the hook and loop fastener from the back of the cover to the original upholstery.
- Or stick the hook and loop fastener together, the bottom fitting under the top.
- Insert the headrest cut outs under the headrest registers.
- Slide the bottom seating cover over the seat, starting from the front towards the back.
- Feed the belts in between the seat.
- Insert the seat belt through the seat belt cut outs of the seatcover.
- In order to attach the laces with the belts you may need to lift the seat(Keep in mind that not all seat can be lifted, if that is the case you seat cover will come equipped with other means of installation).
- Continue the installation by attaching the belts and laces together.
- Proceed to attach the headrest cover on the headrest.
- Attach the headrest cover by pulling the fabric together and attaching the hook and loop fastener.
- Reattach the headrest onto your seat.
- Enjoy your new Custom Seat Covers!


Step-by-Step Installation
Seat Back
1. Due to various seat configurations "Seat Back" will vary on installation!
- If your seat back is ABLE to fold forward, slide the seat cover over the seat back
- If your seat back is UNABLE to fold forward your seat cover will come eqipped with laces and belts and hook and loop fastener. Slide the laces behind the seat back until you are able to securely attach them to the belts provided.
2. Once the cover is secure with a tight snug fit proceed to attaching the hook and loop fastener to the back of the cover or tightening up the laces
NOTE:
- In some installations, the front flap hook and loop fastener attaches to the original fabric in between the seat
- If cover has plastic wedges, they will hook onto the seat once they have been tucked in
3. Follow up by pushing the fabric under the headrest plastic units
Seat Bottom
1. With some seat bottoms you'll need to remove the entire bottom cushion to apply the cover
There are two different ways to remove the bottom cushion
- Pull up on the cushion until it's disengaged from it's hinges
- Pull on the release lever located near the hinge and pull up on the cushion
2. Once the cover is applied proceed to attaching the straps to the appropriate buckle. Smooth out the cover with one hand as you do so.
Headrest
1. Fit the headrest covers over headrest by working them down.
2. Secure the cover with the hook and loop fastener.
3. Reapply the headrest to the seat.